

Strawberry Cheesecake Protein Balls: A Deliciously Nutritious Treat
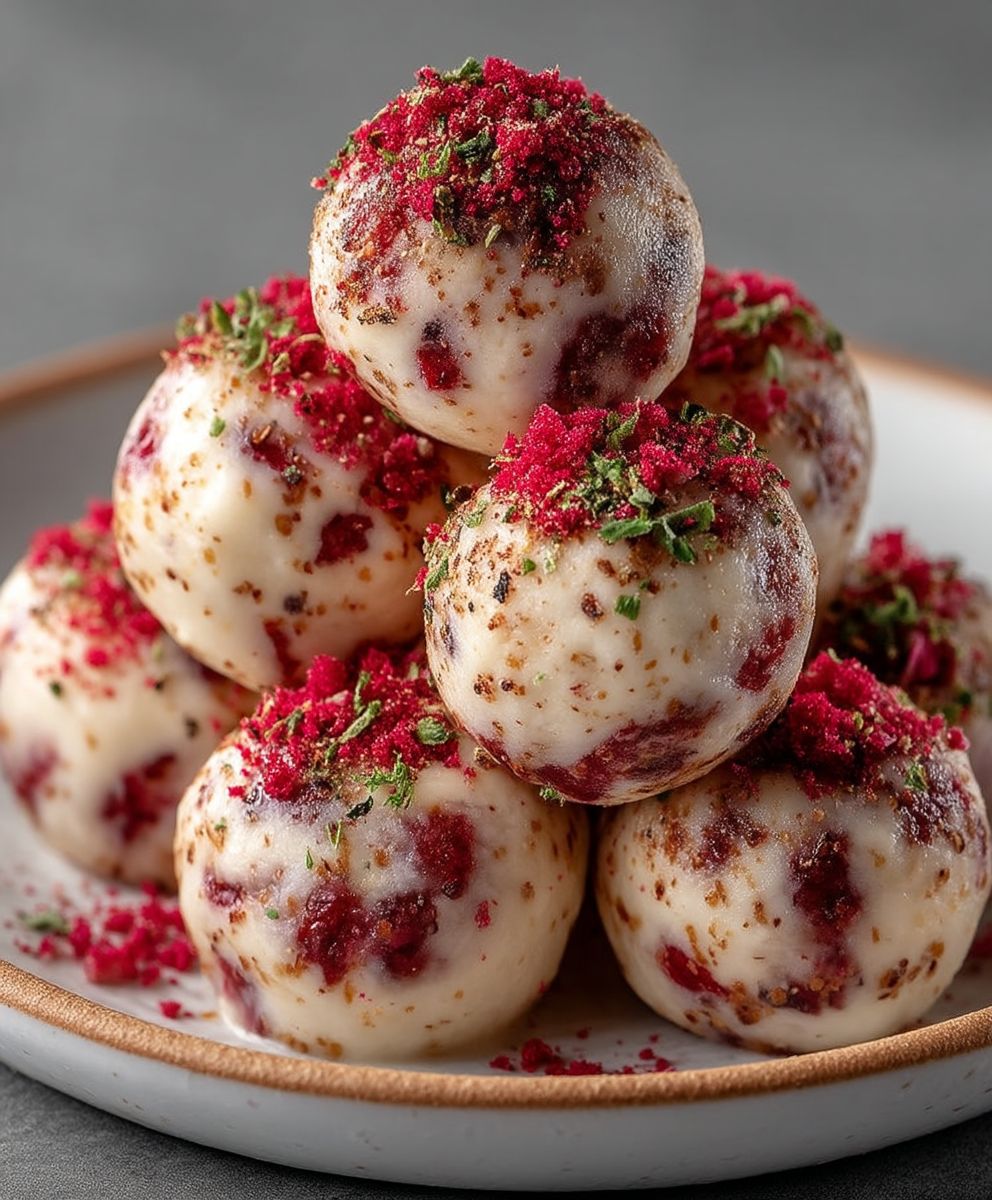
Strawberry Cheesecake Protein Balls are the perfect blend of indulgence and health, making them an irresistible snack for anyone looking to satisfy their sweet tooth without the guilt. These delightful bites not only capture the essence of a classic cheesecake but also pack a protein punch that keeps you energized throughout the day. Originating from the need for convenient, nutritious snacks, protein balls have gained immense popularity among fitness enthusiasts and busy individuals alike.
What makes Strawberry Cheesecake Protein Balls so beloved is their creamy texture combined with the sweet and tangy flavor of fresh strawberries. They are incredibly easy to prepare, requiring minimal ingredients and no baking, which means you can whip them up in no time. Whether you enjoy them as a post-workout snack or a midday treat, these protein balls are sure to become a staple in your kitchen. Join me as we dive into this delightful recipe that brings together the best of both worlds: taste and nutrition!
Ingredients:
- 1 cup rolled oats
- 1 cup almond flour
- 1/2 cup vanilla protein powder
- 1/2 cup cream cheese, softened
- 1/4 cup honey or maple syrup
- 1/2 cup fresh strawberries, chopped
- 1 teaspoon vanilla extract
- 1/4 teaspoon salt
- 1/4 cup shredded coconut (optional)
- 1/4 cup crushed graham crackers (for coating, optional)
Preparing the Mixture
- In a large mixing bowl, combine the rolled oats, almond flour, and vanilla protein powder. Stir these dry ingredients together until they are well mixed.
- In a separate bowl, add the softened cream cheese, honey (or maple syrup), vanilla extract, and salt. Using a hand mixer or a whisk, blend these ingredients until they are smooth and creamy.
- Once the cream cheese mixture is smooth, gradually add it to the dry ingredients. Mix well until everything is combined. The mixture should be thick and slightly sticky.
- Gently fold in the chopped strawberries. Make sure they are evenly distributed throughout the mixture. If you want to add a little extra texture, you can also fold in the shredded coconut at this stage.
Forming the Protein Balls
- Once the mixture is well combined, it’s time to form the protein balls. I like to use a small cookie scoop or my hands for this step.
- Take a small amount of the mixture (about 1 tablespoon) and roll it into a ball between your palms. If the mixture is too sticky, you can dampen your hands slightly with water to make rolling easier.
- Continue rolling the mixture into balls until all of it is used. You should end up with about 20-25 protein balls, depending on the size you make them.
Coating the Protein Balls (Optional)
- If you want to add a little extra flavor and texture, you can coat the protein balls in crushed graham crackers or shredded coconut.
- To do this, place the crushed graham crackers or shredded coconut in a shallow dish.
- Roll each protein ball in the coating until it is fully covered. This step is optional but adds a nice touch to the final product.
Chilling the Protein Balls
- Once all the protein balls are formed and coated, place them on a baking sheet lined with parchment paper.
- Cover the baking sheet with plastic wrap or foil and place it in the refrigerator.
- Let the protein balls chill for at least 30 minutes. This helps them firm up and makes them easier to eat.
Storing the Protein Balls
- After chilling, you can transfer the protein balls to an airtight container.
- Store them in the refrigerator for up to one week. They also freeze well, so you can keep them in the freezer for up to three months.
- When you’re ready to enjoy them, simply take out a few and let them thaw for a few minutes if they are frozen.
Enjoying Your Strawberry Cheesecake Protein Balls
- These protein balls make a perfect snack or a quick breakfast option. They are packed with protein and healthy ingredients, making them a great choice for a post-workout treat or a midday pick-me-up.
- Feel free to experiment with different mix-ins or coatings. You can add nuts, seeds, or even a drizzle of dark chocolate for a different flavor profile.
- Share them with friends or family, or keep them all to yourself – I won’t judge!
Tips for Success
- Make sure your cream cheese is softened to room temperature for easier mixing.
- Use fresh strawberries for the best flavor, but you can also use freeze-dried strawberries if fresh ones are not available.
- If you prefer a sweeter protein ball, feel free to adjust the

Conclusion:
If you’re looking for a delicious and nutritious snack that satisfies your sweet tooth while keeping your health goals in check, then these Strawberry Cheesecake Protein Balls are an absolute must-try! Not only are they incredibly easy to make, but they also pack a punch of flavor and nutrition that will leave you feeling energized and satisfied. The combination of creamy cheesecake flavor with the sweetness of fresh strawberries creates a delightful treat that you can enjoy any time of the day.
One of the best things about these protein balls is their versatility. You can easily customize them to suit your taste preferences or dietary needs. For a nut-free version, simply substitute the almond flour with oat flour or a gluten-free blend. If you want to add a little crunch, consider mixing in some crushed nuts or seeds. You can also experiment with different protein powders—vanilla or even chocolate can add a unique twist to the flavor profile. For an extra burst of flavor, try adding a splash of vanilla extract or a sprinkle of cinnamon. The possibilities are endless!
When it comes to serving suggestions, these Strawberry Cheesecake Protein Balls are perfect for on-the-go snacking, post-workout fuel, or even as a sweet treat after dinner. They can be stored in the refrigerator for up to a week, making them a convenient option for meal prep. Pack them in your lunchbox, take them on a hike, or enjoy them as a quick pick-me-up during your busy day. You can also serve them at gatherings or parties as a healthier dessert option that everyone will love.
I encourage you to give this recipe a try and experience the delightful combination of flavors and textures for yourself. Once you’ve made your own batch of Strawberry Cheesecake Protein Balls, I would love to hear about your experience! Did you make any variations? How did they turn out? Sharing your thoughts and tips not only helps me but also inspires others in our community to get creative in the kitchen.
So, roll up your sleeves, gather your ingredients, and let’s whip up some deliciousness! I promise you won’t regret it. Enjoy every bite of these delightful protein balls, and don’t forget to share your creations on social media with your friends and family. Happy snacking!
Strawberry Cheesecake Protein Balls: A Delicious and Healthy Snack Option
These Strawberry Cheesecake Protein Balls are a tasty and healthy snack, combining rolled oats, almond flour, and fresh strawberries. Perfect for a quick breakfast or post-workout treat, they are easy to make and can be enjoyed chilled for a refreshing bite.
Ingredients
- 1 cup rolled oats
- 1 cup almond flour
- 1/2 cup vanilla protein powder
- 1/2 cup cream cheese, softened
- 1/4 cup honey or maple syrup
- 1/2 cup fresh strawberries, chopped
- 1 teaspoon vanilla extract
- 1/4 teaspoon salt
- 1/4 cup shredded coconut (optional)
- 1/4 cup crushed graham crackers (for coating, optional)
Instructions
- In a large mixing bowl, combine the rolled oats, almond flour, and vanilla protein powder. Stir these dry ingredients together until they are well mixed.
- In a separate bowl, add the softened cream cheese, honey (or maple syrup), vanilla extract, and salt. Using a hand mixer or a whisk, blend these ingredients until they are smooth and creamy.
- Once the cream cheese mixture is smooth, gradually add it to the dry ingredients. Mix well until everything is combined. The mixture should be thick and slightly sticky.
- Gently fold in the chopped strawberries. Make sure they are evenly distributed throughout the mixture. If you want to add a little extra texture, you can also fold in the shredded coconut at this stage.
- Once the mixture is well combined, it’s time to form the protein balls. Use a small cookie scoop or your hands for this step.
- Take a small amount of the mixture (about 1 tablespoon) and roll it into a ball between your palms. If the mixture is too sticky, you can dampen your hands slightly with water to make rolling easier.
- Continue rolling the mixture into balls until all of it is used. You should end up with about 20-25 protein balls, depending on the size you make them.
- If you want to add a little extra flavor and texture, you can coat the protein balls in crushed graham crackers or shredded coconut.
- To do this, place the crushed graham crackers or shredded coconut in a shallow dish.
- Roll each protein ball in the coating until it is fully covered. This step is optional but adds a nice touch to the final product.
- Once all the protein balls are formed and coated, place them on a baking sheet lined with parchment paper.
- Cover the baking sheet with plastic wrap or foil and place it in the refrigerator.
- Let the protein balls chill for at least 30 minutes. This helps them firm up and makes them easier to eat.
- After chilling, you can transfer the protein balls to an airtight container.
- Store them in the refrigerator for up to one week. They also freeze well, so you can keep them in the freezer for up to three months.
- When you’re ready to enjoy them, simply take out a few and let them thaw for a few minutes if they are frozen.
- These protein balls make a perfect snack or a quick breakfast option. They are packed with protein and healthy ingredients, making them a great choice for a post-workout treat or a midday pick-me-up.
- Feel free to experiment with different mix-ins or coatings. You can add nuts, seeds, or even a drizzle of dark chocolate for a different flavor profile.
- Share them with friends or family, or keep them all to yourself – I won’t judge!
Notes
- Make sure your cream cheese is softened to room temperature for easier mixing.
- Use fresh strawberries for the best flavor, but you can also use freeze-dried strawberries if fresh ones are not available.
- If you prefer a sweeter protein ball, feel free to adjust the amount of honey or maple syrup to your taste.


Leave a Comment